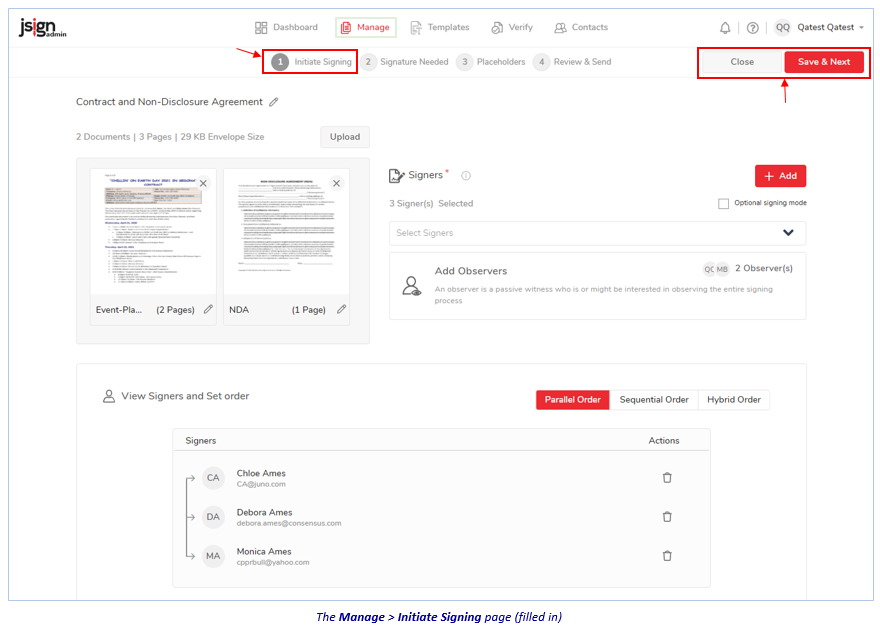
Initiate Signing
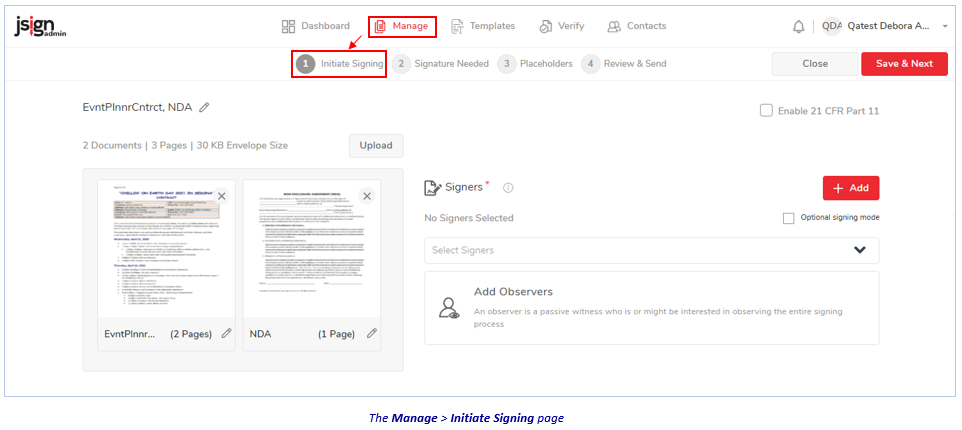
Here, you will describe the document, who will sign it and in what order, and if any witnesses are necessary. To do so:
-
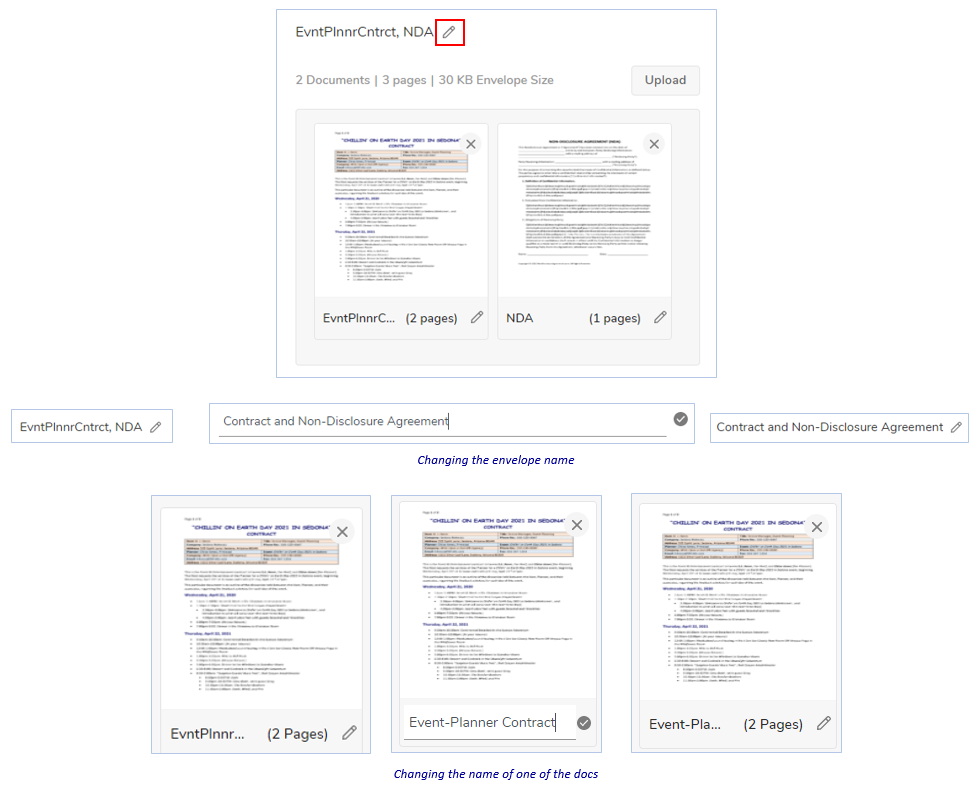
To rename the envelope/document(s): Click the pencil icon, type in the textbox, then click the checkmark to exit.
-
In the Signers pane...
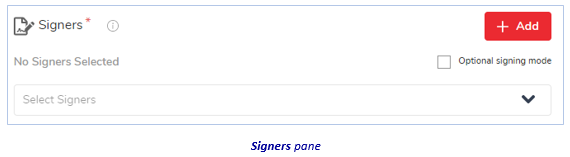
…you can add signers to the document(s) in two ways:
IF you want... THEN... All signers’ names to display on the document(s) (NOTE: These types of documents could be a lease agreement, loan application, trust, marriage license.)
See the bullet directly below. Each signer to see only their name on the document(s) (NOTE: These types of documents could be an employment contract, non-disclosure agreement, credit-card authorization, surgery release.) Click here. -
To have ALL signers’ names display on the document(s):
-
Click the Select Signers drop-down arrow, and check the names of the relevant individuals—or group (of individuals). (The menu is populated from your contacts list, via Enter Contacts' Information. And, if you’re not sure who should sign, see the NOTE below.)

-
Then, click Done. The View Signers and Set Order pane appears your signers’ names.
-
-
To have EACH signer see only their name on the document(s):
-
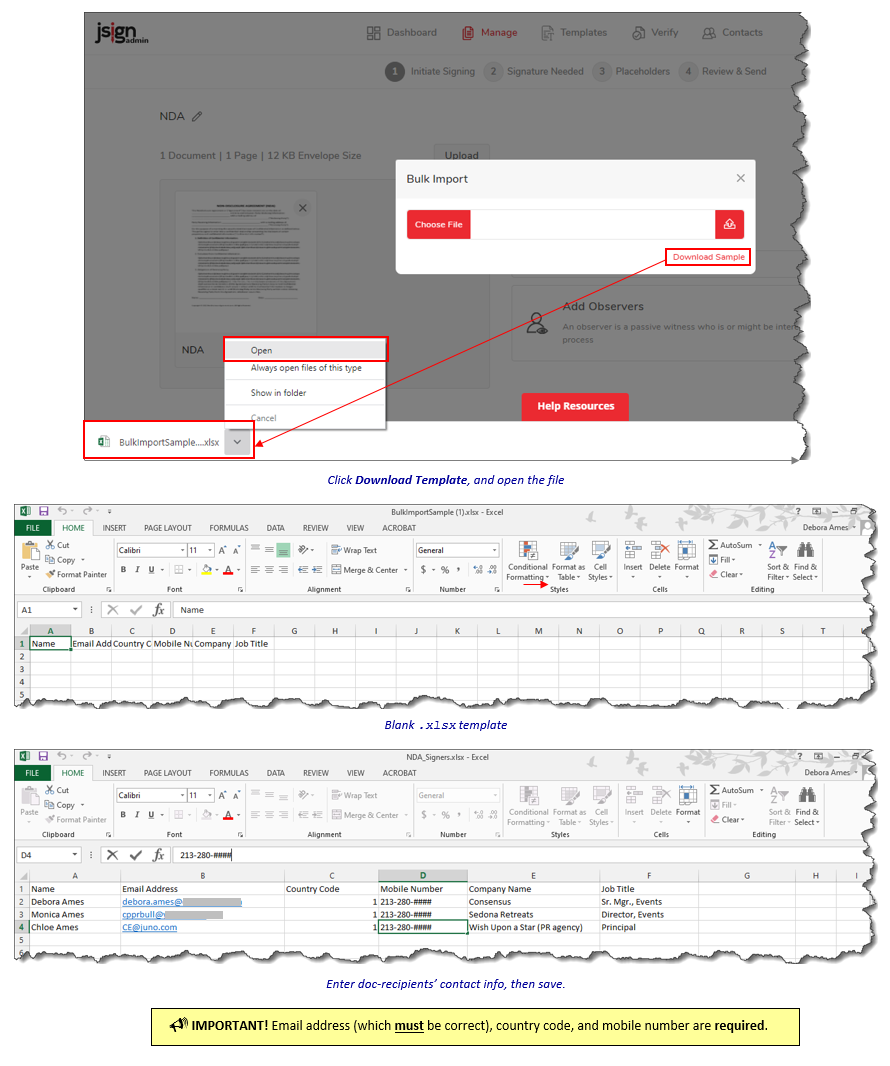
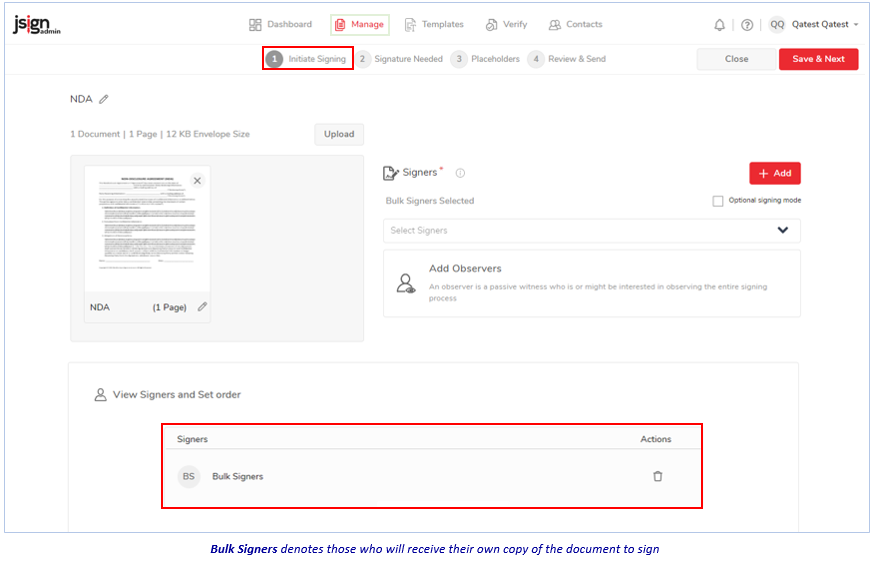
Click the Add button in the Signers pane, and select Import Bulk Signers. The Bulk Import dialog appears.

-
To create a new bulk-signers list, see the bullet below—OR—to upload an existing list, click here.
-
To create a new bulk-signers list:
-
Click the Download Sample link. (NOTE: Because this file is .csv-compatible, it may have been created in a Microsoft Excel file or as a Google Doc.)
-
Open the file, enter the requested information on the blank template—then save it. (You can rename it upon saving, if you wish.)
-
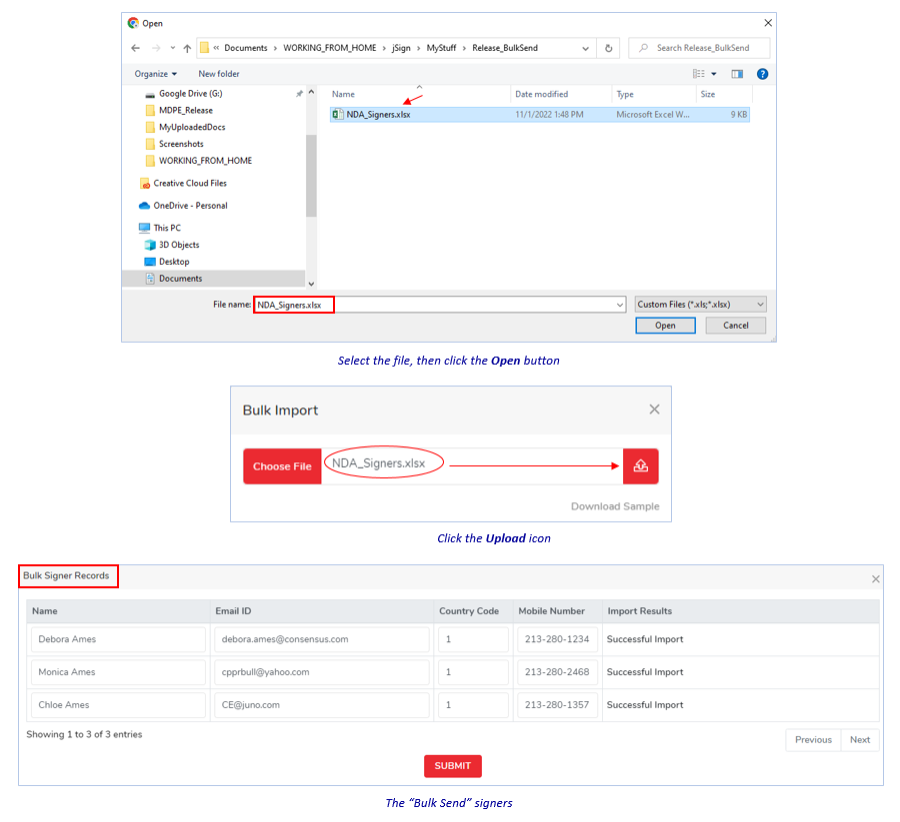
Go back to the Bulk Import dialog, click Choose File, navigate to and select the file (its name appears in the Bulk Import textbox)—then click the Upload (into jSign) icon. The signers’ names appear, listed in the Bulk Signer Records pane.
-
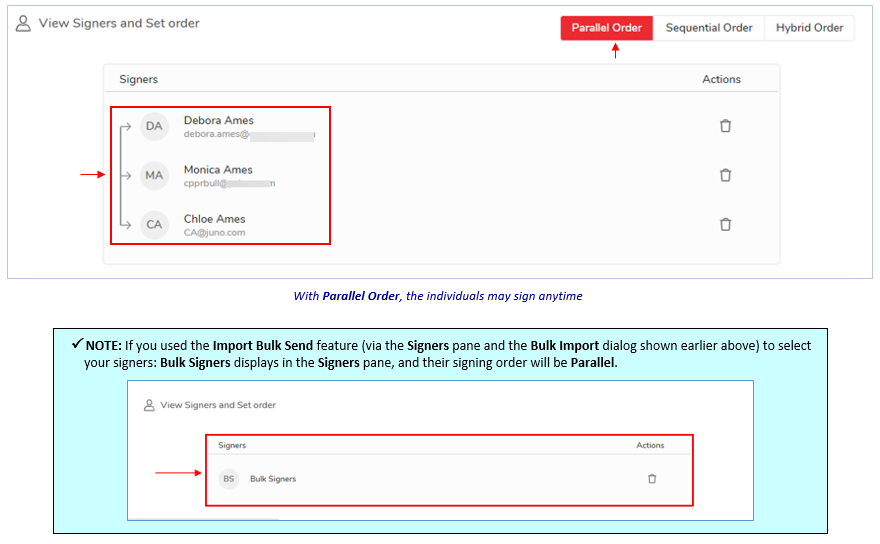
Click the Submit button. The Manage > Initiate Signing page reappears, with Bulk Signers shown in the View Signers and Set Order pane.
-
Proceed to the Add Observers pane.
-
-
To upload an existing bulk-signers list:
-
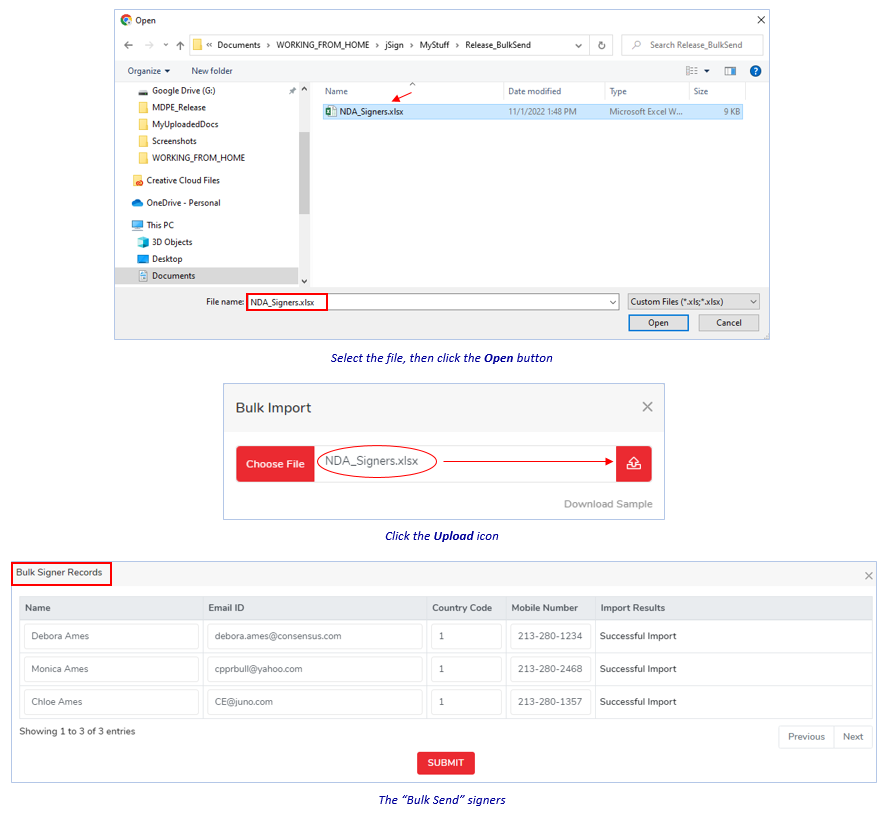
Click the Choose File button, navigate to and select the file (its name appears in the Bulk Import textbox)—then click the Upload (into jSign) icon. The signers’ names appear, listed in the Bulk Signer Records pane.
-
Click the Submit button. The Manage > Initiate Signing page reappears, with Bulk Signers shown in the View Signers and Set Order pane.

-
Proceed to the Add Observers pane.
-
-
-
-
-
Regarding the Add Observers pane:

-
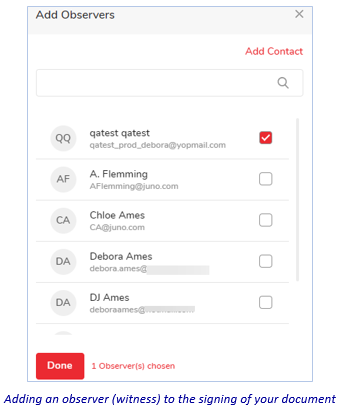
Click it and on the dialog, check the boxes of—or enter a full or partial name, and click the magnifying icon to search for—the individual(s) who will act as witnesses to the signing of this document.
-
If you need to add another observer:
-
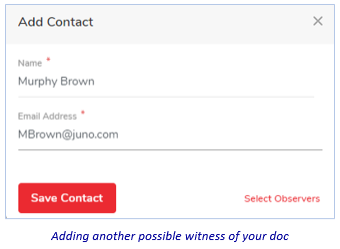
Click the Add Contact link on the Add Observers dialog (above)—then on the Add Contact dialog: Enter the person’s name and email address, and click Save Contact.
-
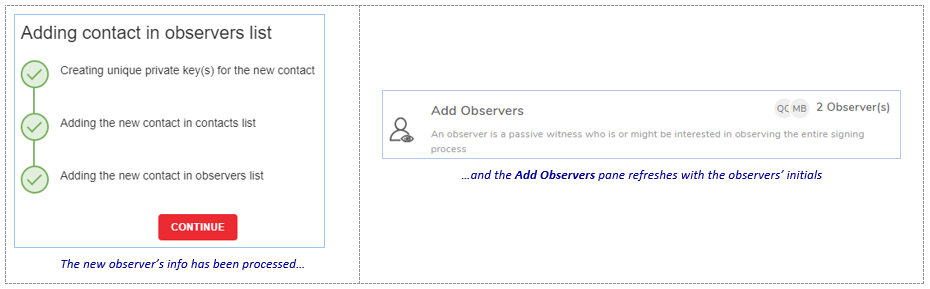
Click the Continue button after the information is processed. The Add Observers pane refreshes with the initials of the observer(s).
-
-
-
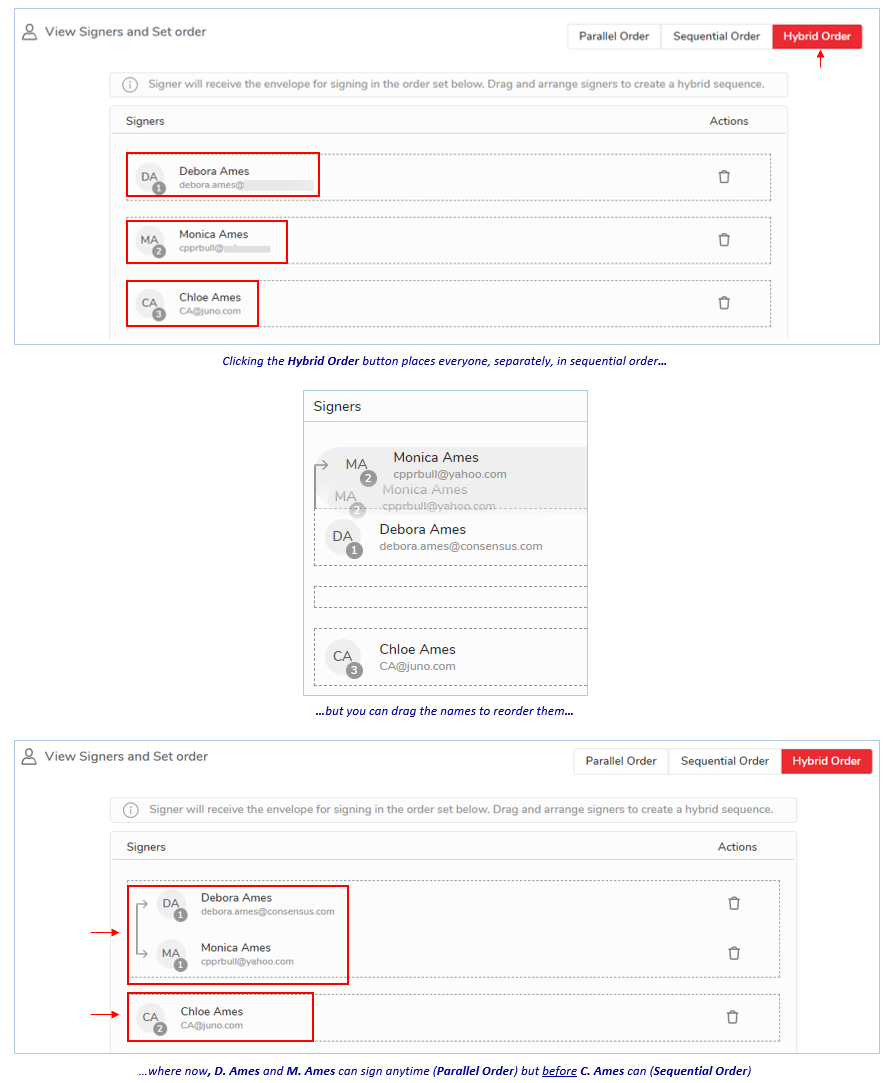
In the View Signers and Set Order pane: Click the Parallel Order button to have your signers sign the document in any order (if you need to, click the Trash icon under Actions to remove a particular signer)…
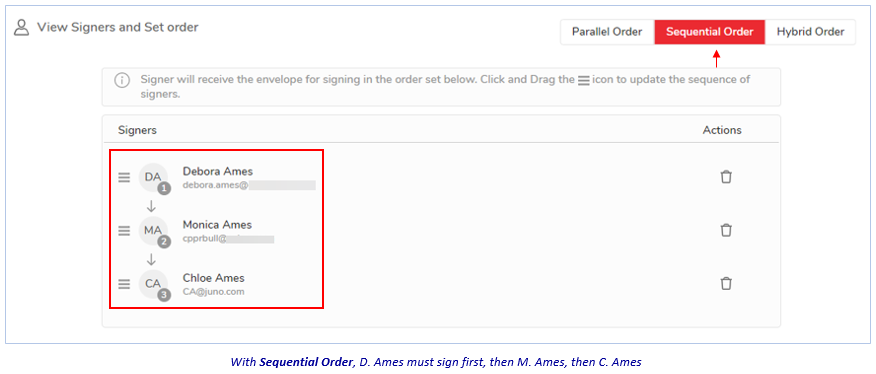
…or the Sequential Order button, to have all signers do so one after another (and if the names display out of order, drag them where you need them to be).
…or the Hybrid Order button, for a combination of the two.
-
Click the Save & Next—or Close—button at the top-right of the page.
If you click:

-
Save & Next – The Indicate Signature page appears. (Proceed to Indicate Signature Type.)
-
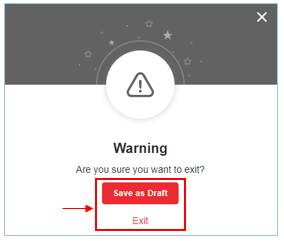
Close – Then, at the Warning prompt, click either:
-
The Exit link, to return to the Dashboard page without saving the draft.
-
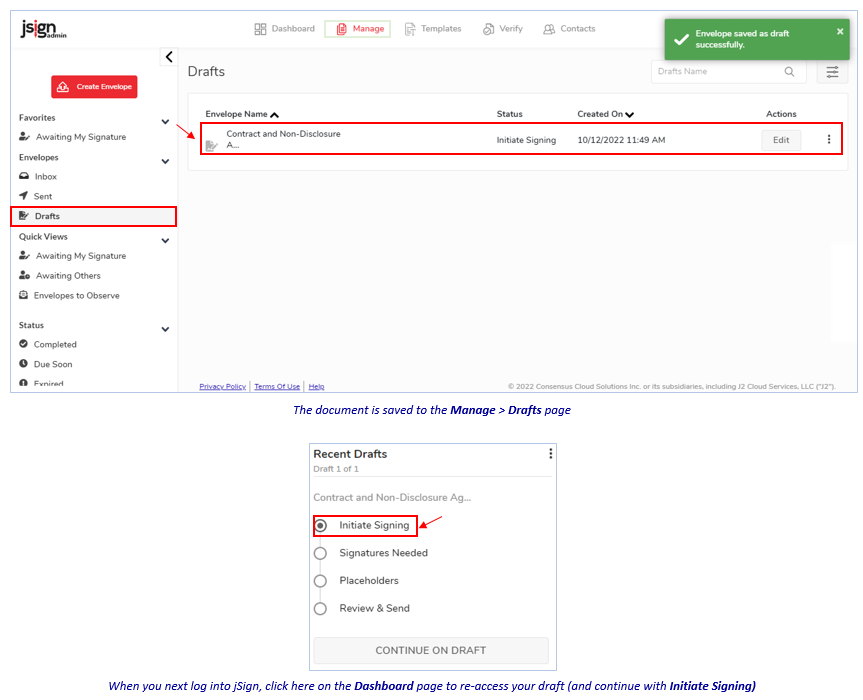
Or, the Save as Draft button. The document will be stored on the Manage > Drafts page (and when you next log in, click the Continue on Draft buttonin the Recent Drafts tile [see further below] on your dashboard).
-
-
-
Proceed to Indicate Signature Type.
Related Topics